No-Fail Lemon Bars: Achieve Perfectly Sliced Squares Every Time
There are few desserts as universally adored as classic
lemon bars. With their vibrant, tangy lemon custard filling atop a buttery shortbread crust, they embody a perfect balance of sweet and tart that refreshes and satisfies. Whether you're bringing a treat to a bake sale, sharing with friends, or simply indulging in a homemade delight,
lemon bars are always a hit. They transport well, keep beautifully, and evoke a sense of nostalgic comfort with every bite. But beyond the irresistible flavor, there's a particular satisfaction in presenting a platter of perfectly cut, uniform squares. This guide will not only help you create the best
lemon bars you've ever tasted but also ensure they slice into professional, flawless pieces every single time.
The Anatomy of a Perfect Lemon Bar: Beyond Just Ingredients
The magic of exceptional
lemon bars lies in understanding the interplay between its two core components: the crust and the filling. It’s a delicate dance of textures and flavors that, when balanced correctly, creates an unforgettable dessert.
The Buttery Shortbread Crust: Foundation of Flavor
Every great building needs a strong foundation, and for
lemon bars, that’s the shortbread crust. Made with simple pantry staples – butter, flour, and powdered sugar – it transforms into a thick, buttery base that literally melts in your mouth. The key to its success is often in the details:
*
Cold Butter is Key: Using cold, cubed butter ensures a tender, flaky crust rather than a tough one. The cold butter slowly melts during baking, creating pockets of steam that result in that desired melt-in-your-mouth texture.
*
Don't Overwork the Dough: Mix just until combined. Overworking the dough develops gluten, which can lead to a chewy or tough crust, rather than the delicate, crumbly texture we crave.
*
Pre-baking for Perfection: A quick pre-bake sets the crust, preventing it from becoming soggy when the lemon filling is added. It also ensures it's perfectly golden and contributes to the delightful contrast between the crisp base and the silky topping.
The Zesty Lemon Custard: A Symphony of Sweet and Tart
The star of the show is undeniably the tangy
lemon custard filling. Similar to a luscious lemon curd, it's brimming with satisfying, tangy lemon flavor, perfectly balanced in sweetness. The secret to its vibrant taste and ideal consistency often comes down to two crucial elements:
*
Fresh Lemons Make All the Difference: While some recipes might rely on extracts, using plenty of fresh lemons is non-negotiable for truly sensational
lemon bars. The interplay between fresh lemon zest and juice is what creates that deep, bright flavor. A generous amount of fresh zest is essential – it contains aromatic oils that, when infused with sugar (often by rubbing them together first), provide an unparalleled depth of citrusy goodness. The juice then delivers the beloved tartness.
*
The "No-Fail" Method for Setting: Achieving a filling that sets perfectly without being rubbery or runny is an art. Our method relies on the proper ratio of eggs, sugar, lemon juice, and zest, and a careful baking technique. The eggs provide structure and richness, while sugar balances the tartness of the lemon. This combination, when baked gently, ensures a smooth, silky custard that holds its shape beautifully.
Mastering the Bake: Achieving the Ideal Texture
Baking
lemon bars isn't just about mixing ingredients; it's about technique and precision to achieve that perfect balance of textures.
Choosing Your Pan Wisely
The right baking pan can significantly impact your results. A metal baking pan is generally recommended because it conducts heat evenly and consistently, leading to predictable bake times. If you opt for a glass or ceramic dish, you may need to increase the bake time by a few minutes, as these materials heat up and cool down differently. Regardless of material, the size of your pan (typically 9x13 inches for most recipes) is critical for achieving the correct crust-to-filling ratio and thickness.
A critical, non-negotiable tip for easy cutting later is to **line your pan with parchment paper**. Make sure the parchment extends over the edges of the pan – these 'handles' will be your best friend when it comes to removing the baked bars cleanly.
Baking the Crust to Golden Perfection
Once your shortbread dough is pressed firmly into the parchment-lined pan, it goes into a preheated oven, typically at 350°F (175°C). Bake it until it's lightly golden around the edges and set. This pre-baking step is quick but vital for developing flavor and preventing a soggy bottom.
The Art of Baking the Lemon Filling
Once the crust is pre-baked, the vibrant lemon filling is poured directly over the hot crust. This slight temperature difference helps them bond. The bars then go back into the oven until the filling is set but still slightly jiggly in the very center. What does "slightly jiggly" mean? It means that if you gently shake the pan, the edges should be firm, but the center might have a slight, barely perceptible wobble, similar to a perfectly set crème brûlée. This indicates that the eggs have coagulated enough to hold the structure without overcooking.
*
Avoid Overbaking: Overbaking is the enemy of a silky
lemon bar filling. It can lead to a rubbery, dense texture instead of the delicate, smooth custard you desire.
*
Prevent Underbaking: Conversely, underbaking will result in a runny filling that won't set, making it impossible to slice cleanly. Trust the "slight jiggle" as your guide.
For a foundational recipe that guides you through each step, see our article on
The Best Homemade Lemon Bars: Tart, Gooey & Easy Recipe. If you're looking for an adaptable
Easy Lemon Bars Recipe: Perfect Shortbread Crust & Tangy Filling, we've got you covered.
The Secret to Flawless Squares: Cooling and Cutting Techniques
This is where the promise of "perfectly sliced squares" comes to fruition. Many bakers master the bake but stumble at the finish line. With a few simple tricks, you can elevate your presentation from rustic to professional.
Patience is a Virtue: The Cooling Imperative
After baking, resist the urge to cut into your beautiful
lemon bars immediately. This is perhaps the most critical step for achieving neat slices.
*
Cool Completely: First, allow the bars to cool at room temperature in the pan.
*
Chill Thoroughly: Once completely cool, transfer the pan to the refrigerator and chill for at least 3 hours. *Ideally, chill them overnight.* This prolonged chilling period allows the lemon custard to fully set and firm up, ensuring clean, crisp edges when cut. Attempting to cut warm or insufficiently chilled bars will result in a messy, gooey disaster.
The Precision Cut: Tools and Technique
Once your
lemon bars are thoroughly chilled, it’s time to perform the perfect slice.
1.
Lift with Parchment: Use the parchment paper overhang as handles to lift the entire slab of
lemon bars out of the pan and onto a clean cutting board.
2.
Choose Your Weapon: A sharp, thin-bladed chef's knife is your best tool.
3.
The Hot Knife Trick: For truly professional-looking cuts, run your knife under very hot water for 30-60 seconds. Wipe it completely dry with a clean towel. The warm blade will glide through the custard and crust more cleanly.
4.
Clean Between Cuts: After each cut, run the knife under hot water again and wipe it clean. This removes any sticky residue, preventing drag and ensuring subsequent cuts are just as pristine.
5.
Press, Don't Saw: Instead of sawing back and forth, press the knife straight down through the bars with firm, even pressure. This creates cleaner edges.
6.
Score for Uniformity: For perfectly uniform squares, you can lightly score the surface of the bars first to plan your cuts before going all the way through.
7.
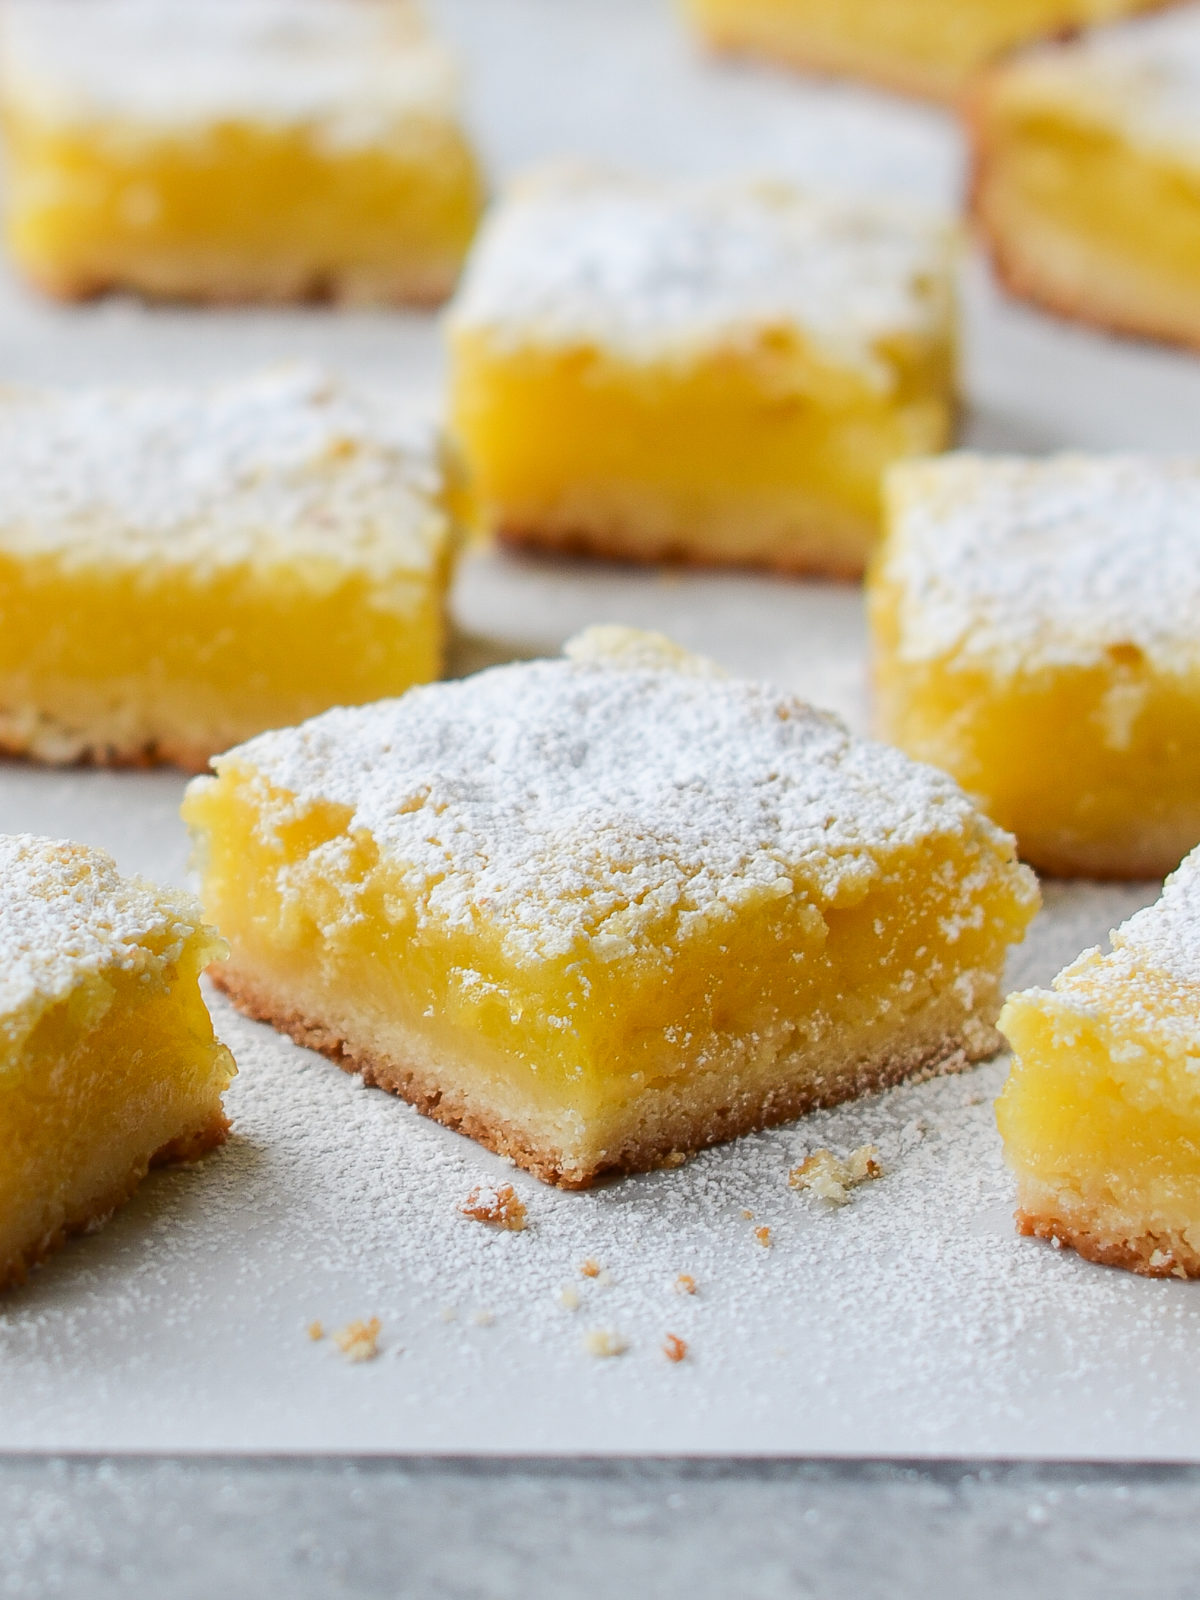
Dust After Cutting: If you plan to dust your
lemon bars with powdered sugar, do it *after* they have been cut. This prevents messy lines and ensures each square has a beautiful, even dusting.
Pro Tips for Your Best Lemon Bars Yet
*
Ingredient Quality: Always prioritize fresh, high-quality ingredients. Freshly squeezed lemon juice and zest, good quality butter, and fresh eggs make an undeniable difference in flavor.
*
Don't Rush the Chill: We can't stress this enough – patience with chilling is truly the most significant factor in achieving clean, perfectly sliced
lemon bars.
*
Storage: Store leftover
lemon bars in an airtight container in the refrigerator for up to 3-5 days. They actually taste even better the day after they are made!
*
Serving: While perfect on their own, a dollop of whipped cream or a few fresh berries can elevate the presentation and experience.
Crafting
lemon bars that are not only bursting with flavor but also perfectly cut into neat, inviting squares is a truly rewarding experience. By following these detailed tips and techniques, from ingredient selection to the final, precise slice, you’ll consistently achieve a dessert that looks as incredible as it tastes. So go ahead, embrace the joy of baking, and create your own batch of no-fail
lemon bars that will impress everyone fortunate enough to taste them.